-
The following steps help you set up an iPhone to access
a mailbox.
1.Tap the Settings badge on the main screen of your iPhone.
2.The Settings page opens.
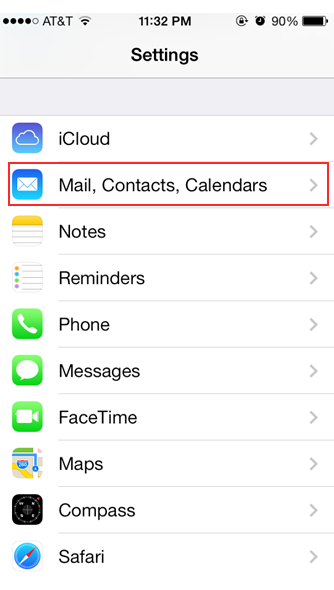
3.Tap Mail, Contacts, Calenders
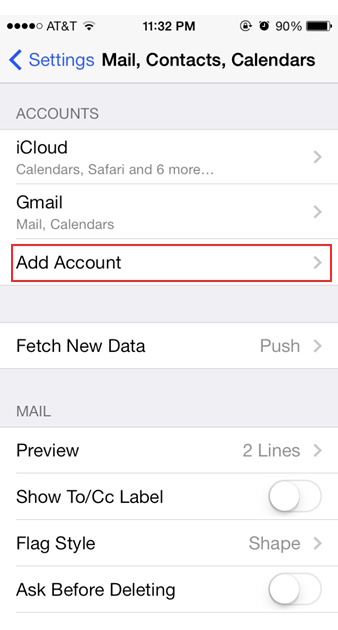
4.Tap Add Account
5.Tap Add Mail Account
The Add Mail Account page opens.
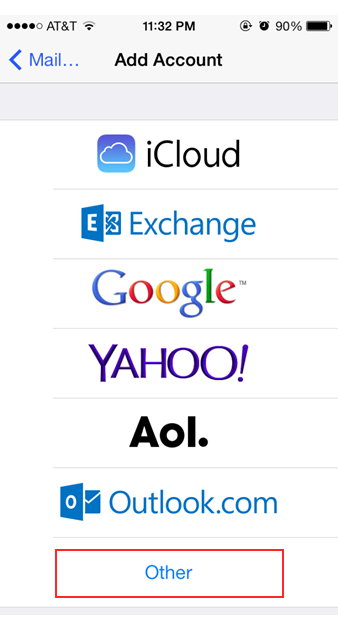
6.Tap Other

7.Enter the following information for the email account:
Name : Your name, which displays on the receiving end.
Email : Your email address, which is where replies are sent to and should likely be
the same as your username.
Password : Your password.
Description : Description of this account.
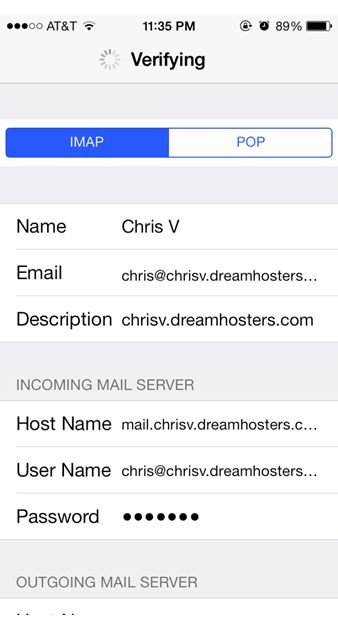
8.After the email account is found, enter the following information for the Incoming
and Outgoing Mail Servers (see info below):
Incoming Mail Server
Host Name : mail.example.com (replace example.com with your actual domain
name.)
Username : address@example.com (the email address you're accessing.)
Password : Password for the email address. If you don't know what this is, you
can request it from the (Panel > 'Mail' > 'Manage Email') section of
your panel by clicking edit for the address.
Outgoing Mail Server (SMTP)
Host Name : mail.example.com (replace example.com with your actual domain
name.)
Username : address@example.com (the email address you're accessing.)
Password : Password for the email address.
9.After you enter the above information, tap Save at the top.
Troubleshooting
The iPhone automatically detects the rest of the settings and connects to your
mailbox. However, in some cases, it may not properly connect the first few times.
You may need to hit the Connect button again and try this a few times before it
connects properly. This is a strange function within the mail program on the iPhone
that causes this behavior.
-
The following steps help you set up an Android device to
access a mailbox.
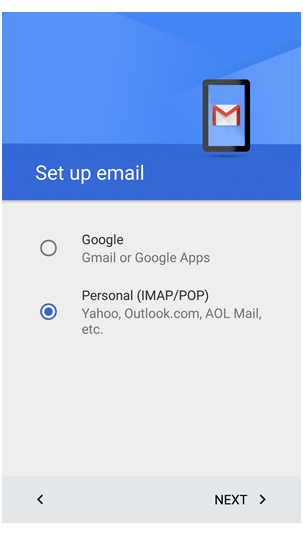
1.Open the mail app.
2.Select the 'Personal (IMAP/POP)' option.
3.Enter the email address you wish to connect to. In this example, the email is
email@websitehelp.support
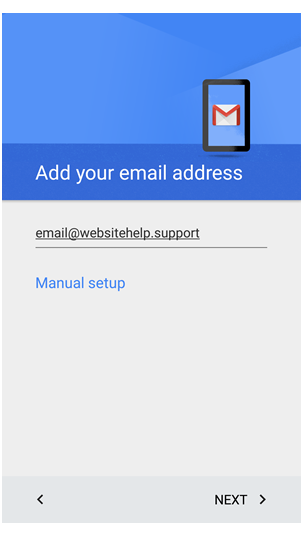
4.Click the NEXT button
5. Choose which type of account you'd like to use. IMAP is recommended
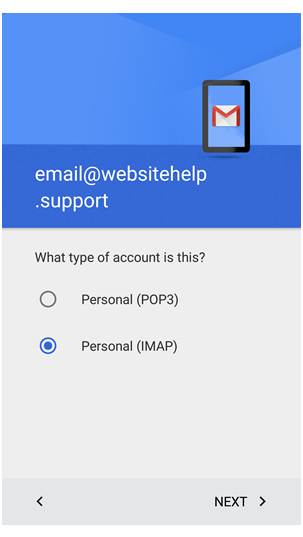
6. Enter your password
The Incoming server settings screen opens:

7. Enter the following 'Incoming' server settings:
Username : Your full email address
Password : The password of your email address
SERVER : Make sure to change this to mail.example.com (where example.com is your
domain)
PORT : Enter port 993
SECURITY TYPE – SSL/TLS (accepts all certificates)

8.Click the NEXT button.
The Outgoing server settings screen opens:
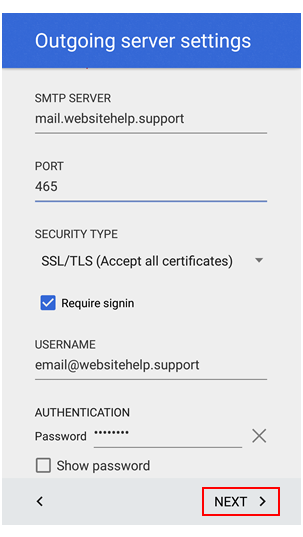
9. Enter the following 'Outgoing7#39; server settings:
SERVER : Make sure to change this to mail.example.com (where example.com is your
domain)
PORT : Enter port 993
SECURITY TYPE – SSL/TLS (accepts all certificates)
Username : Your full email address
Password : The password of your email address
10.Click the NEXT button.
The Account options screen opens:
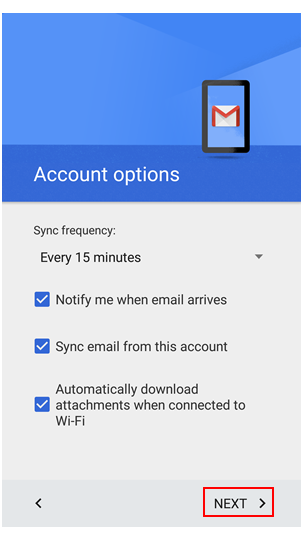
11. Select your desired settings.
12. Click the NEXT button.
A screen opens confirming your address is properly configured:
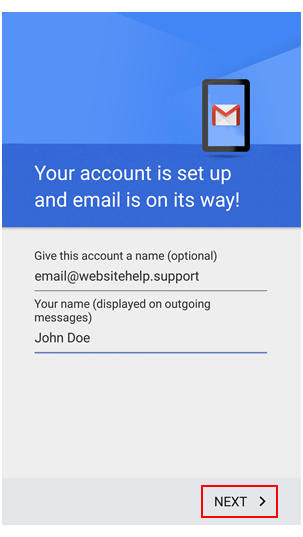
13. Fill in the following two options:
Give this account a name (Optional) – Just leave this as your address
Your name (Displayed on outgoing messages) – You can change this to your actual name
if you like
14. Click the NEXT button to complete the configuration.
-
The following steps help you set up Apple Mail to access
a mailbox.
1.Open the Apple Mail application by clicking Mail in the top menu bar.
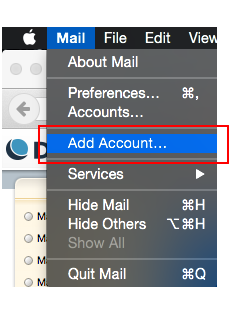
2.Select the Add Account option
The 'Choose a mail account to add...' page opens:
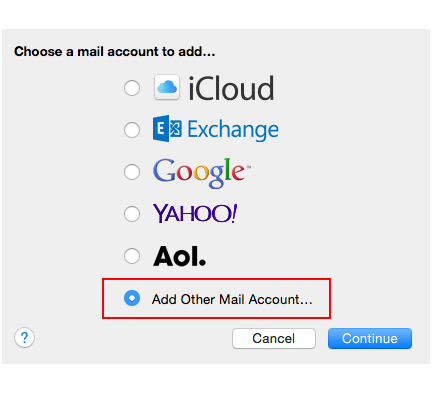
3.Select the Add Other Mail Account… option and click the Continue button.
In this example, we'll use the email address "user@dhwiki.dreamhosters.com":
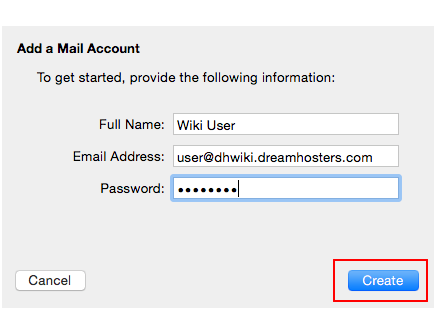
4. Enter the following:
Full Name: This is how you'd like your name displayed when sending email.
Email Address: This field must contain the full email address
Password: This is the password you set up for the email when creating it in your
panel.
5. Click the Create button when finished.
You should receive notification that the Account must be manually configured:
6. Click the Next button to proceed to manually configure your email address.
After you click Next to proceed, the Incoming Mail Server Info Page opens:
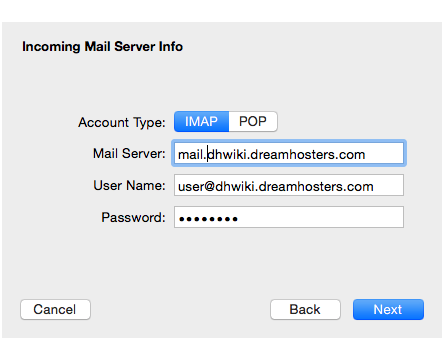
7. Enter the following settings on the Incoming Mail Server Info page:
Account Type: IMAP
Mail Server: mail.YOURDOMAIN.COM (replacing YOURDOMAIN.COM with your actual domain
name).
User Name: Your full email address
Password: The password of your email address.
8. Click the Next button to proceed.
After you click Next, you should receive a warning about the mail server
certificate:
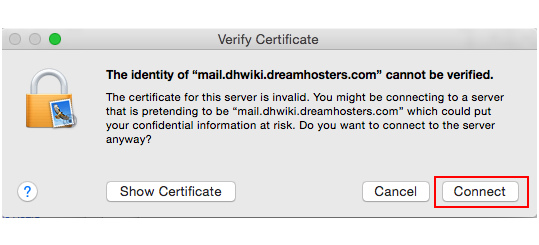
9. Click the Connect button to accept the certificate.
After you connect, the Outgoing Mail Server Info page opens:
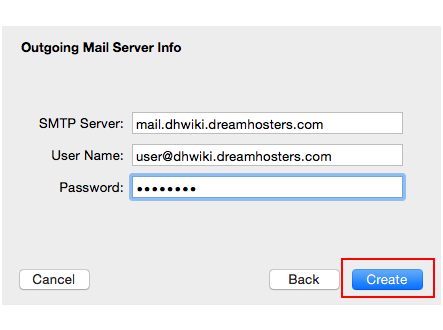
10. Enter the following settings on the Outgoing Mail Server Info page:
SMTP Server: Use mail.YOURDOMAIN.COM (replacing YOURDOMAIN.COM with your actual
domain name as you did previously).
User Name: Your full email address
Password: TThe password of your email address.
11. Click the Create button to create the email address.
Your new email address is now set up and ready to use.
-
The following steps help you set up Outlook to access a
mailbox.
1.Open Outlook.
2.Go to Account setup and Add an email account
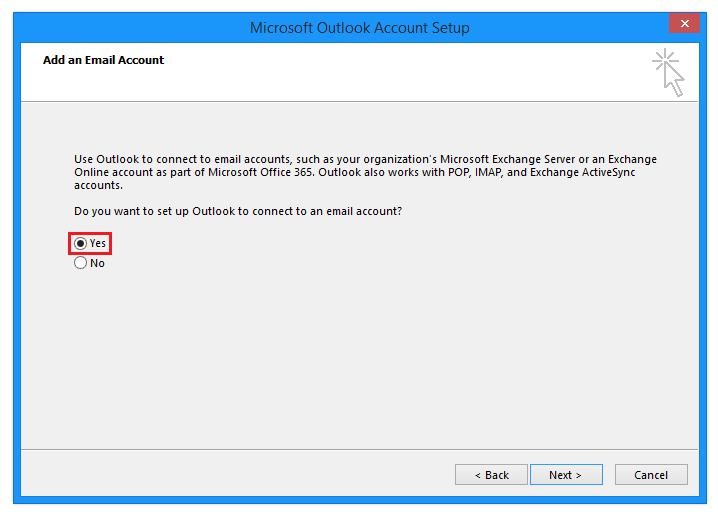
2.Select 'Yes' to create a new email account.
3.Click the Next button
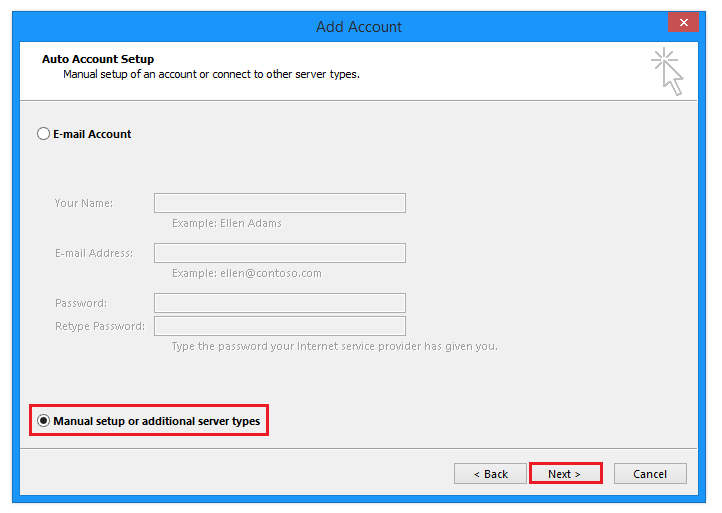
4. Select the radio button titled 'Manual setup or additional server types'.
5. Click the Next button.
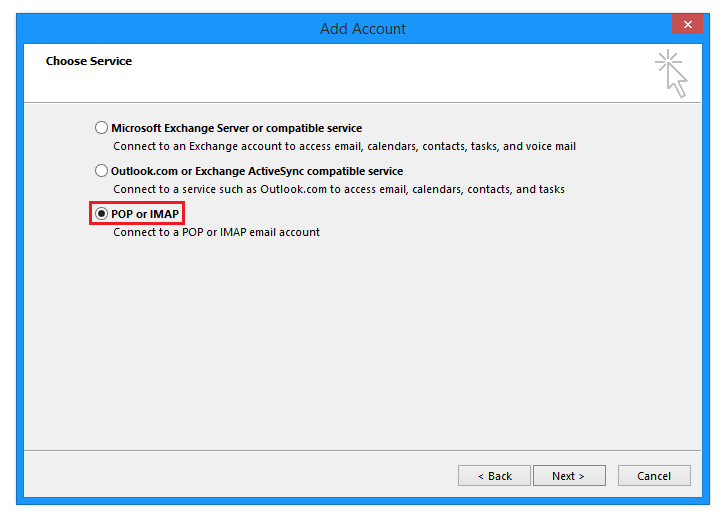
6.Select the radio button titled 'POP or IMAP'.
7.Click the Next button.
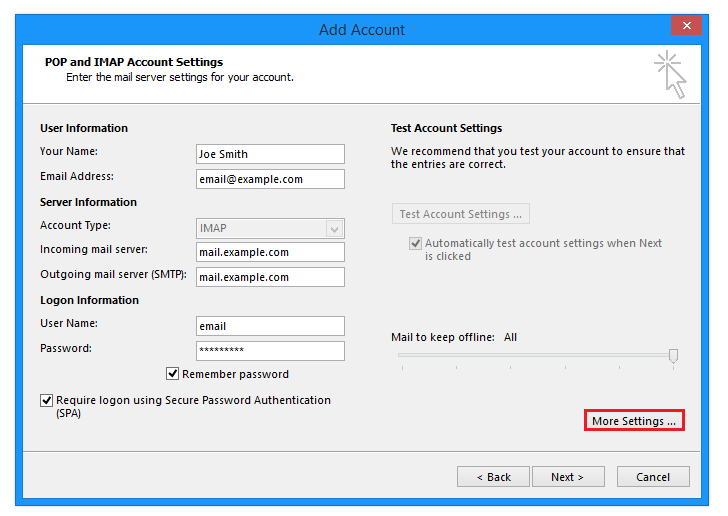
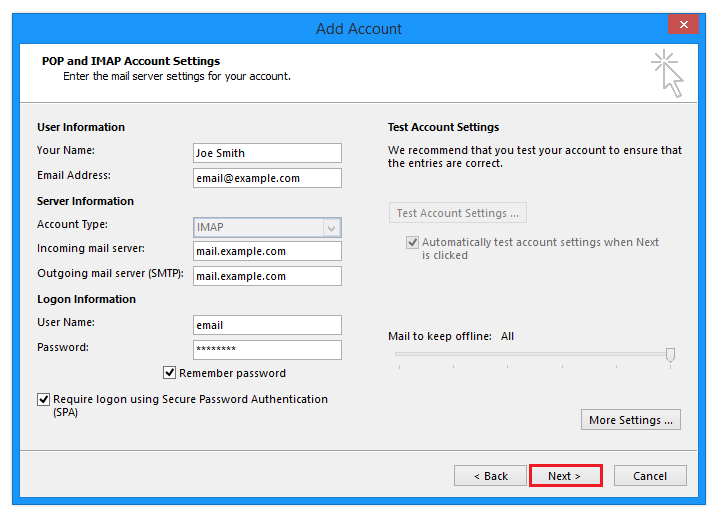
8. Enter your email credentials.
9. On the bottom right, click the More Settings... button.
A popup box appears:
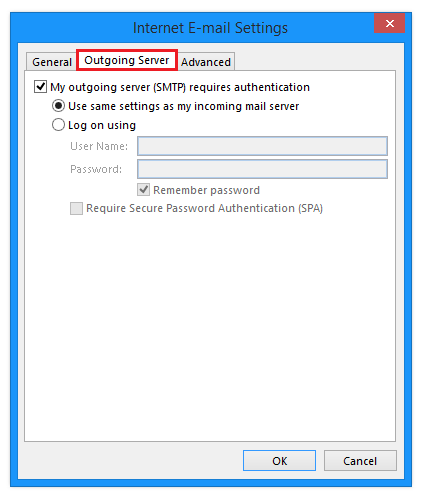
10. Select the 'Outgoing Server' tab.
11. Check the box titled 'My outgoing server (SMTP) requires
authentication'.
12. Check the radio box titled 'Use same settings as my incoming mail
server'.
13. Click the 'Advanced' tab.
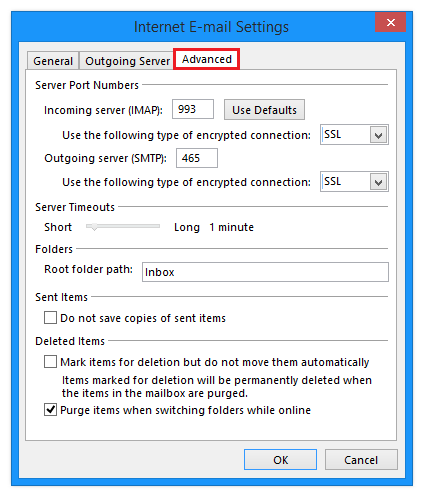
14. Select which ports and security settings you'd like to use.
15. Enter the word 'Inbox' in the field 'Root folder path:'.
16. Click the Ok button to save your changes.
17. On the previous page, click the Next button to proceed.
A security warning popup box appears:
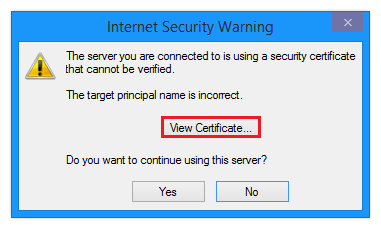
This warning appears because the certificate being used is NOT for your specific
domain – it's for 'mail.dreamhost.com'. This is a normal warning which
you can accept to continue the setup.

18.Click Yes to accept the certificate.
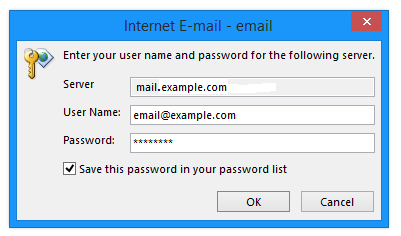
19. Confirm your Server, User Name, and Password. You must do this twice.
After the tests are complete, a 'Congratulations!': box appears:
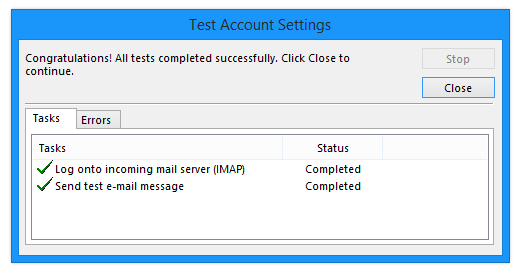
20. Click Close to continue.
A final confirmation box confirms the account has been added:
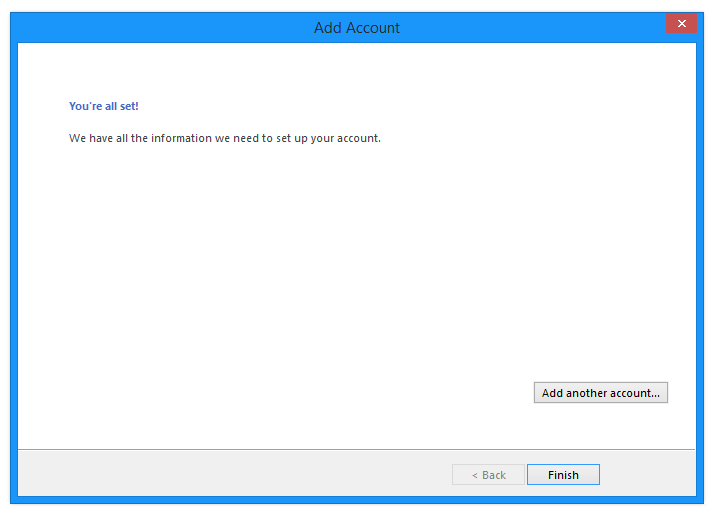
21. Click Finish to complete the setup.